The purpose of the multi-timer in CaseQube is to make time tracking for law firms more accurate, efficient, and organized, especially when attorneys or staff are handling multiple matters at once.
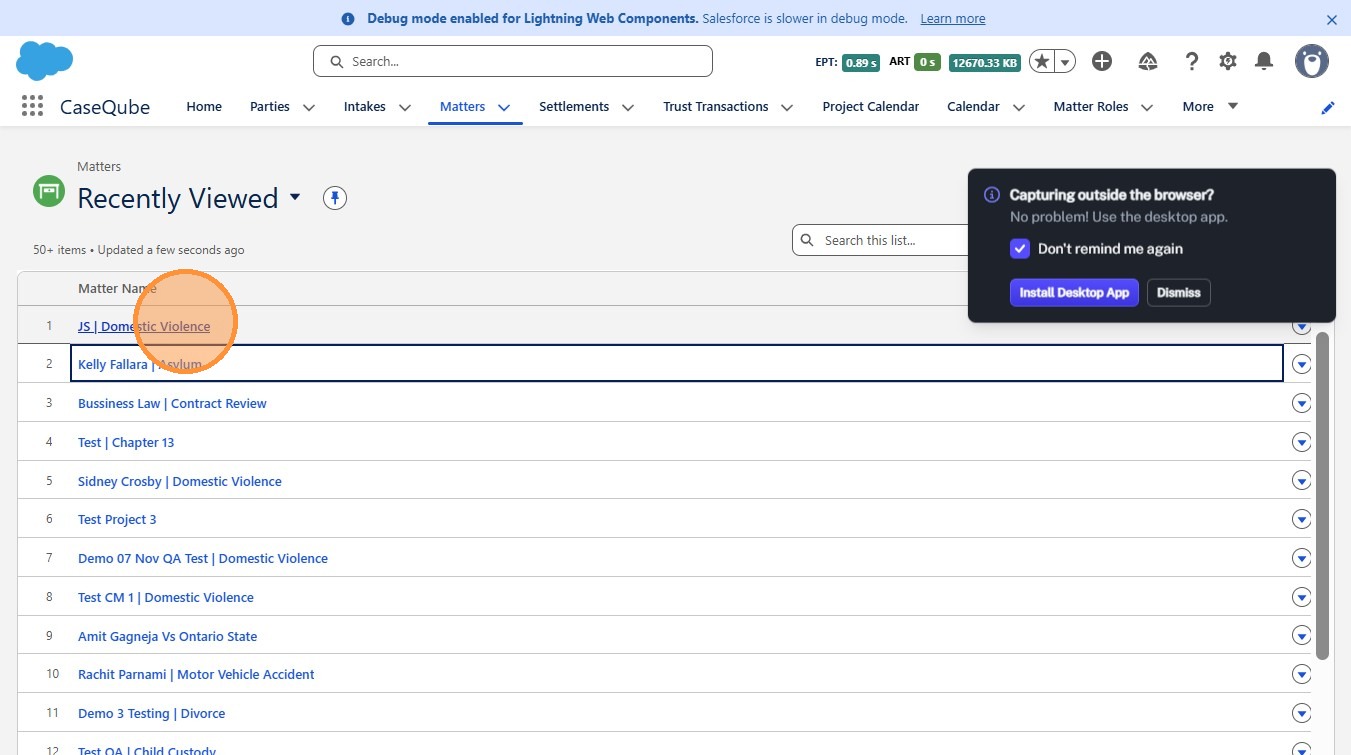
1. #### Step 1: Open the Matter
-
Log in to CaseQube.
-
Navigate to the Matters tab.
-
Search for and open the Matter you want to track time for
 />
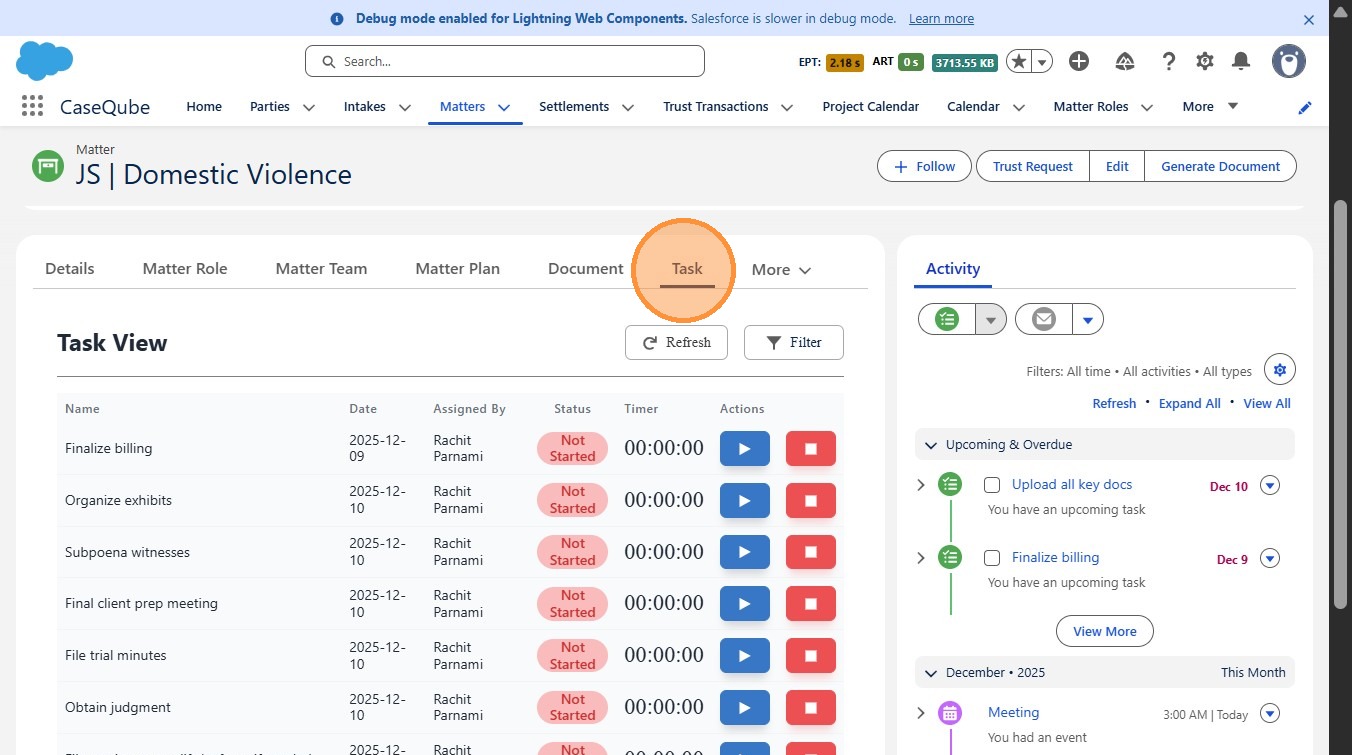
2. #### Step 2: Open the Task Tab
- View Assigned Tasks that Need to be Completed
 />
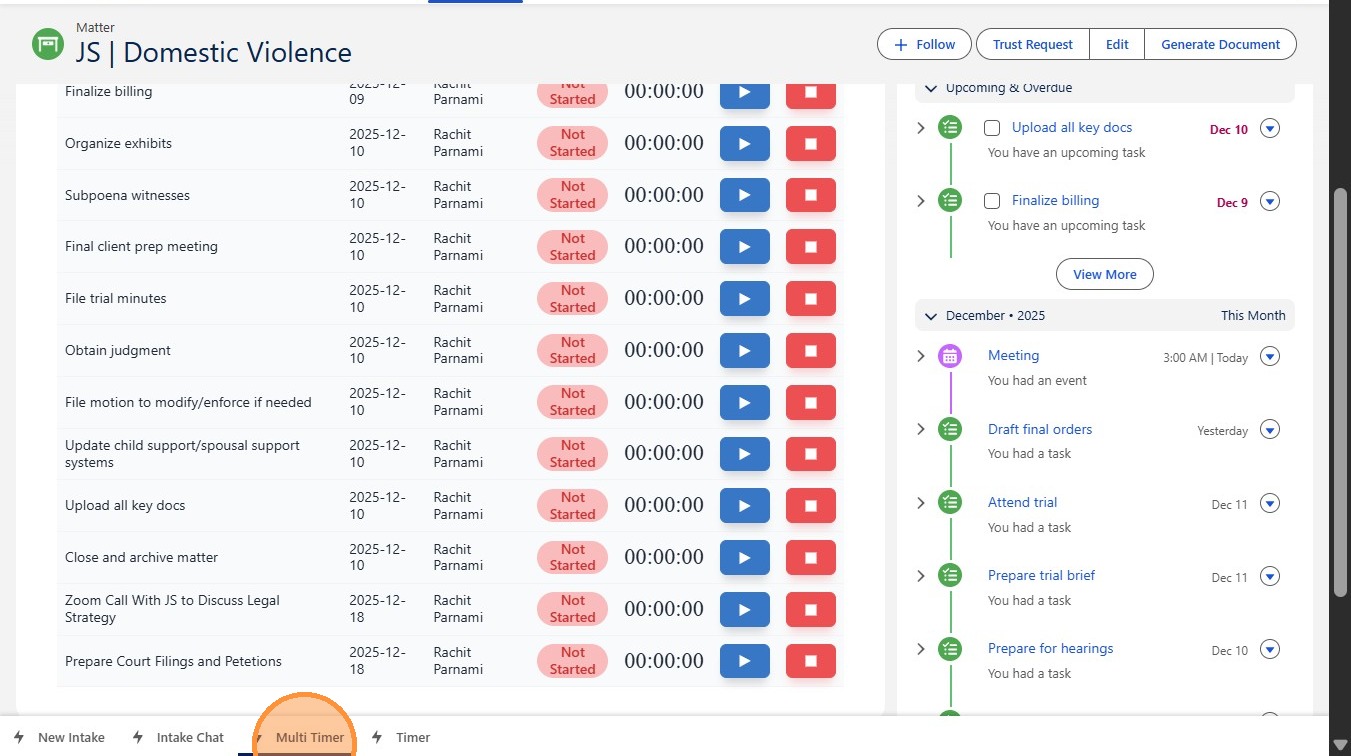
3. #### Step 3: Access the Multi-Timer
-
At the bottom of the page, locate the Multi-Timer
-
Click on Multi-Timer to open the tracking interface.
 />
4. #### Step 4: Enter the Task Name
-
Type the name or description of the task you are working on, then click Start.
-
If you are working on multiple tasks or Matters simultaneously, start a separate timer for each task (for example: a Zoom call with Client JS while also preparing court filings and petitions).
 />
5. #### Step 5: Start, Pause, Stop or Edit Feature on Timers
-
Each timer has Start, Pause, Stop, Edit buttons:
-
Start- Allows you to Start time
-
Pause – temporarily stops the timer while you switch tasks.
-
Stop – ends the timer when the task is completed and takes user to a manual entry screen
-
Edit- Allows you to edit name of timer screen
-
 />
6. #### Step 6: Manually Enter Time Entry Details
-
After clicking the Red Square (Stop) button, you will be taken to the Time Entry Detail page.
-
Pre-filled fields such as Description, Date, and Duration will appear—verify that this information is correct.
-
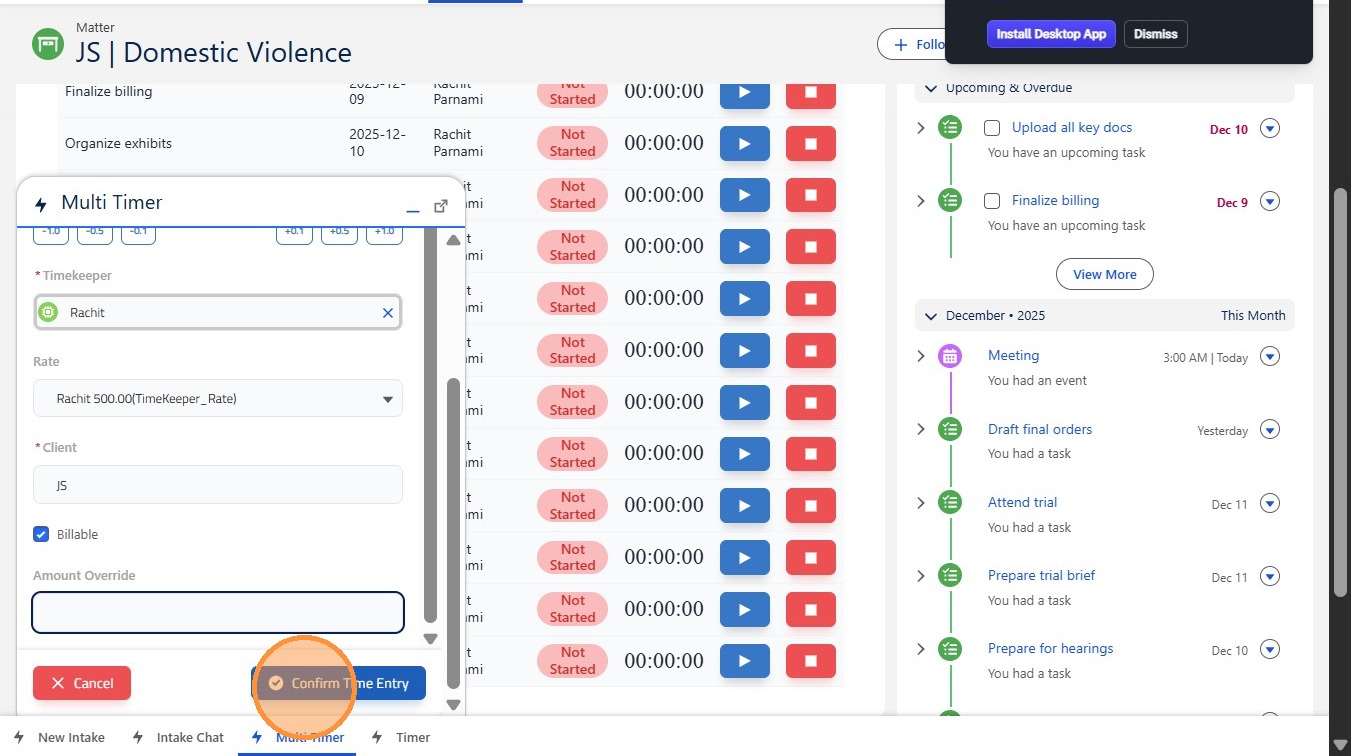
Manually select the Project, adjust the Duration if needed (note: duration must be at least 5 minutes to be billable), and assign the Timekeeper, Rate, Ammount Override (if necessary)
 />
7. Step 7: Save Time Entry
- After Verifying all Information is Correct, Click Confirm Time Entry
 />
8. #### Step 8: View Your Billing Entry
-
Click More.
-
Select Billing Details.
-
Locate your time entry to review the recorded information.
 />