This guide provides a step-by-step process for performing a conflict search, ensuring that users can efficiently manage their legal records. By following these instructions, users can streamline their workflow, enhance accuracy in conflict checks, and maintain compliance with legal standards. It's an essential resource for legal professionals looking to optimize their intake management and improve overall productivity.
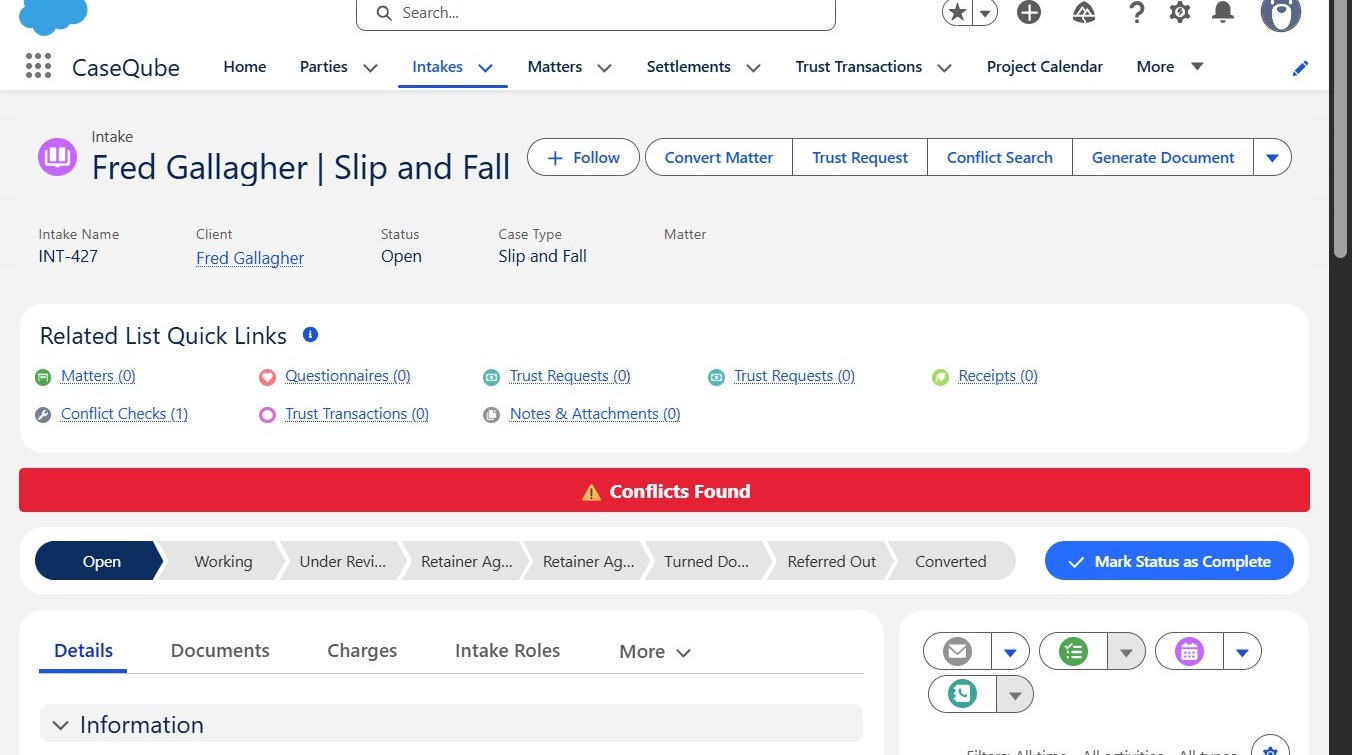
1. Navigate to the Intake Record
Open the relevant intake record in Salesforce.
 />
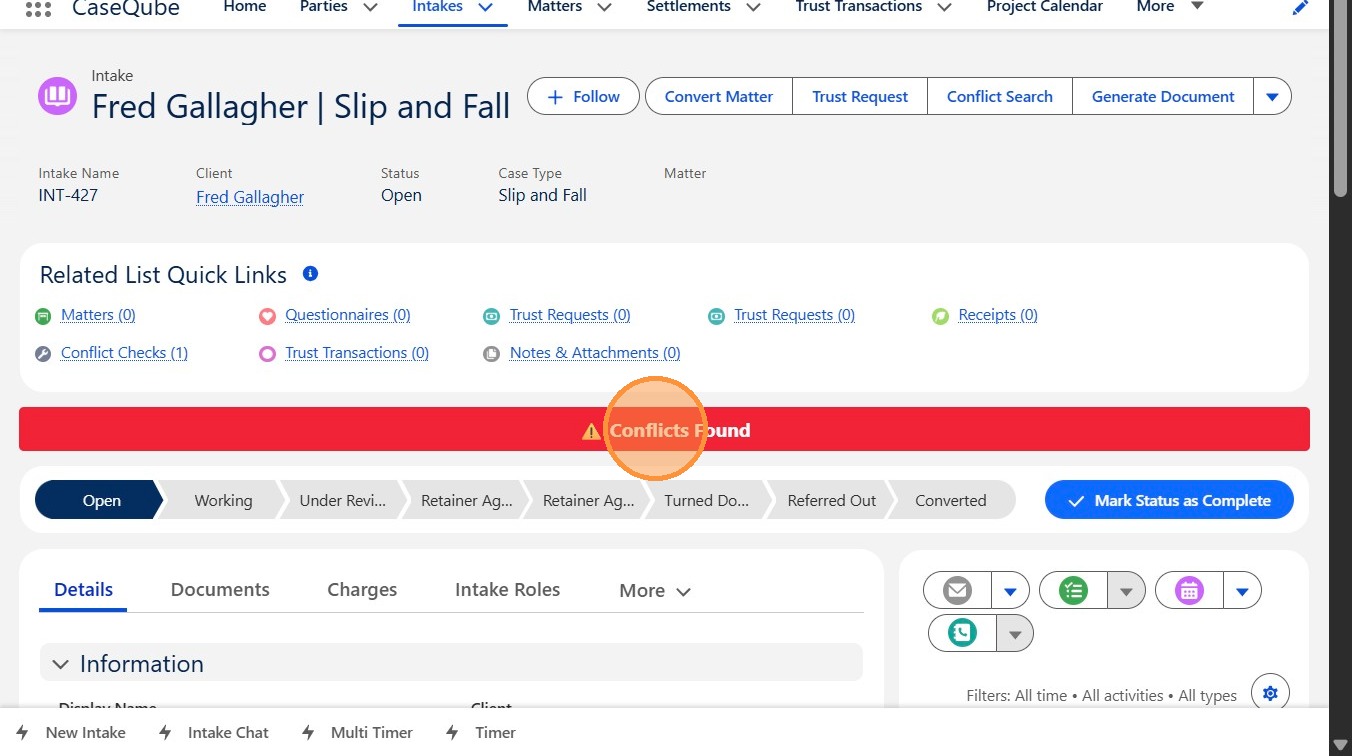
2. Review the Conflict Banner
Check the conflict status banner at the top of the record:
-
Green indicates No Conflict; conflict check is not needed
-
Red indicates Potential Conflicts Requiring Review; a manual conflict check can begin
 />
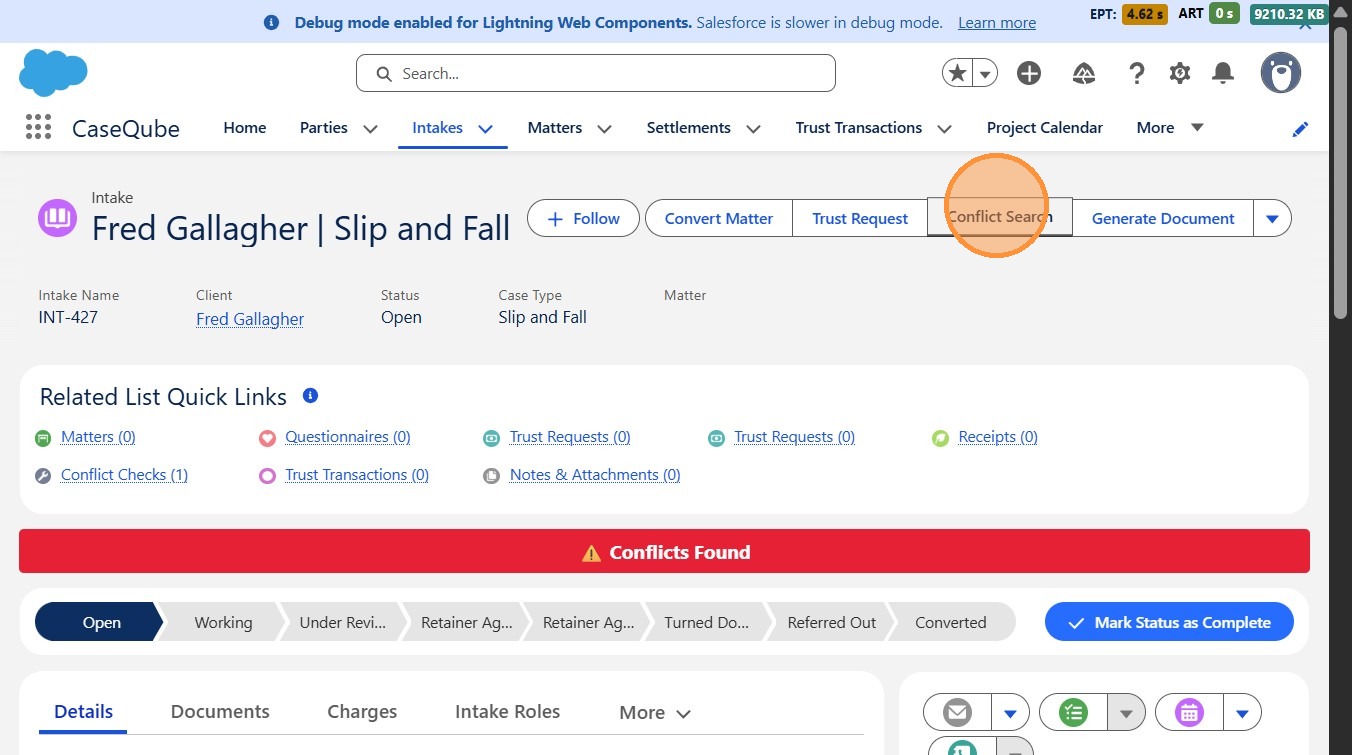
3. Initiate the Conflict Search
Click the Conflict Search button.
 />
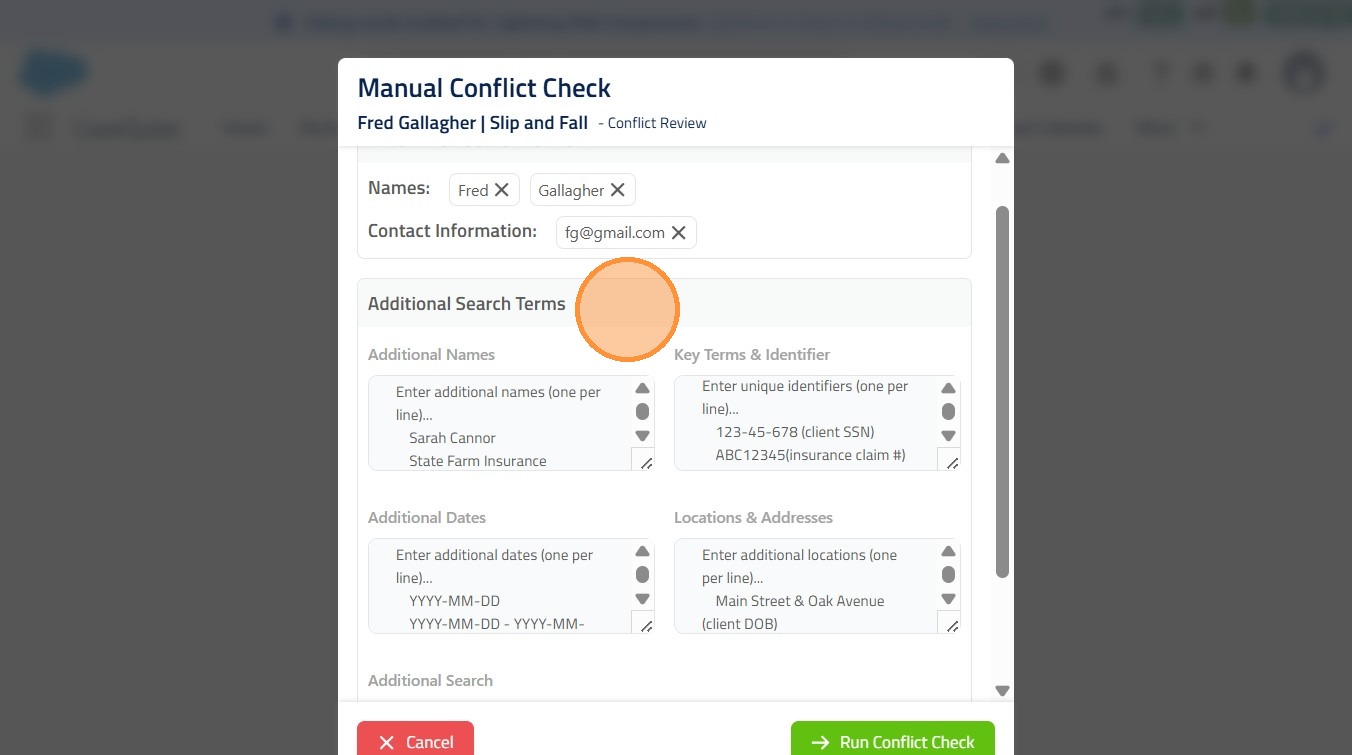
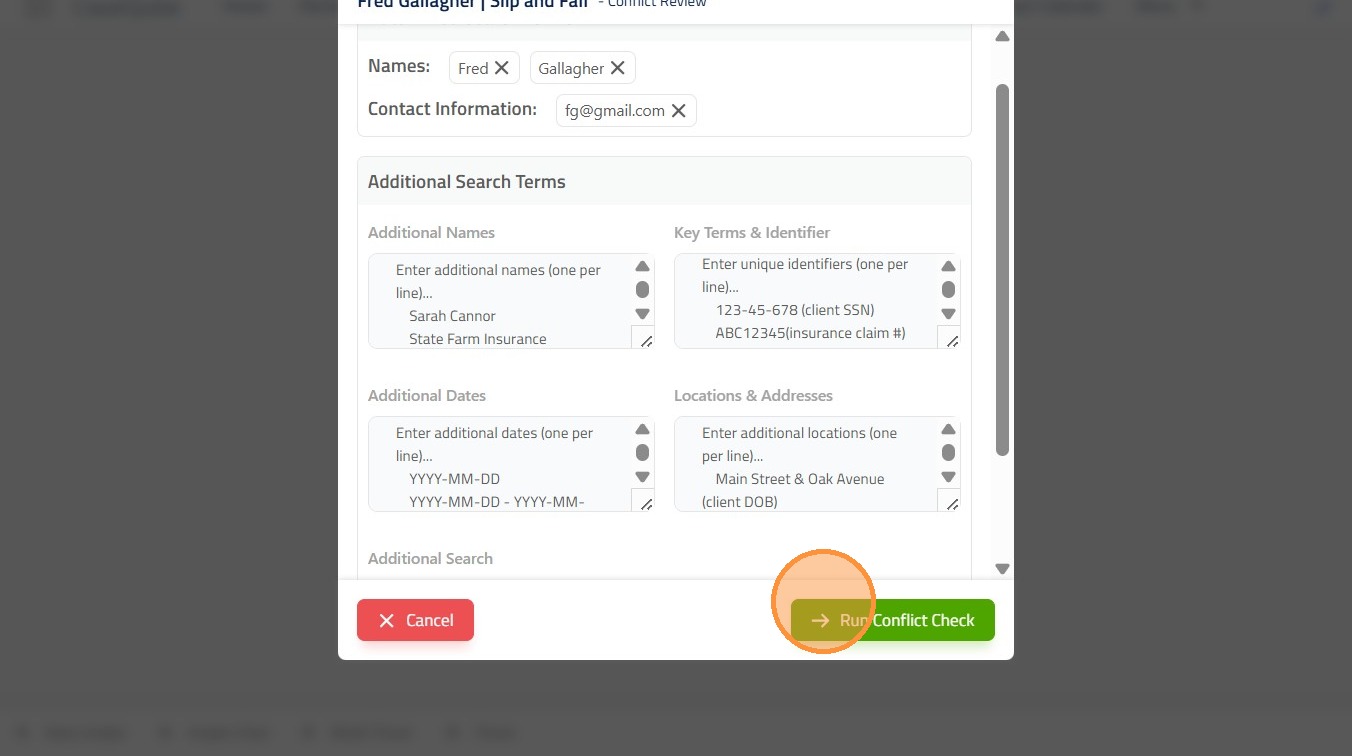
4. Verify Search Criteria
Review the pre-filled search terms (name and contact information) and add any additional relevant information as needed. Additional search terms may include alternate names, key terms and identifiers, relevant dates, locations, and addresses. This information can be found on the potential client’s detail page.
 />
5. Run the Conflict Check
Click Run Conflict Check to begin the search.
 />
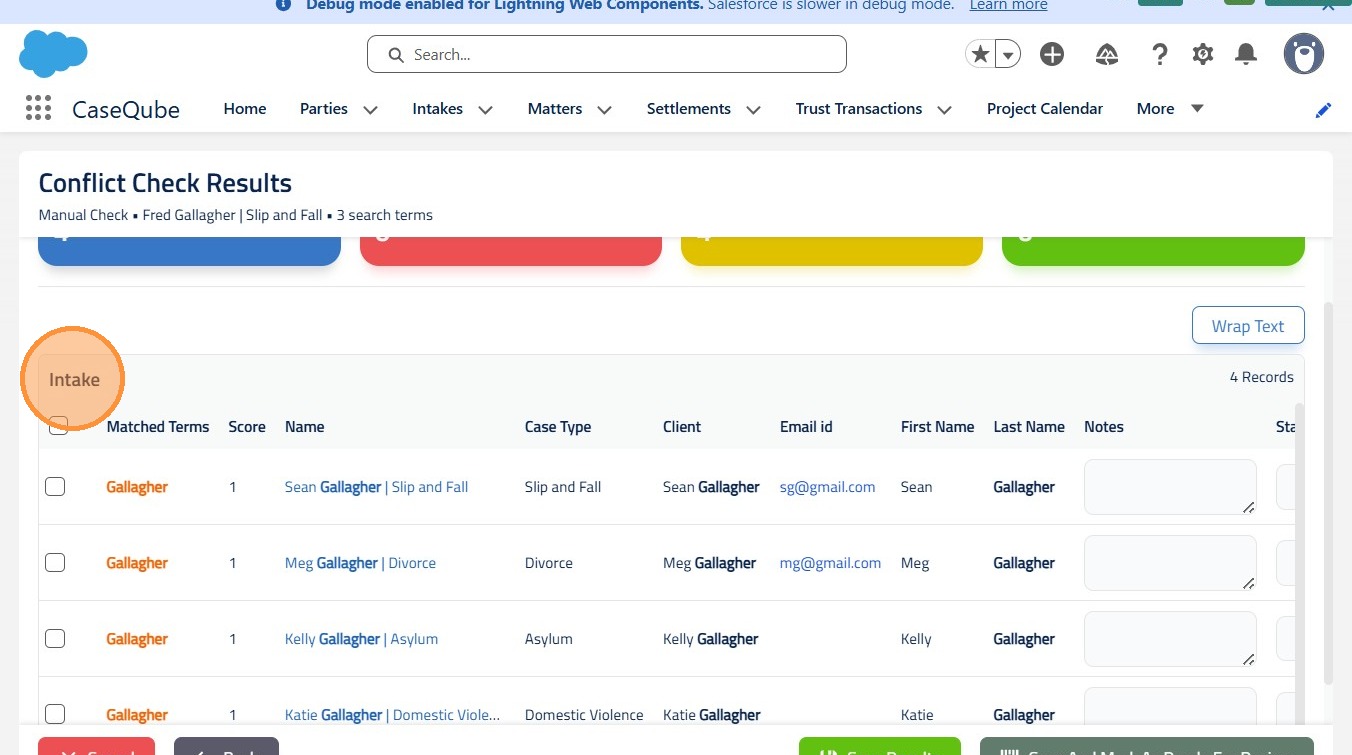
6. Review Search Results
Review the search results, which can be organized by Intake and Matter, and scroll through each section to check for potential conflicts. The review process occurs twice—initially by a staff member and then by the attorney for final review
 />
7. Add Attorney Notes (If Needed)
If further review is required, enter notes in the designated Notes field for the attorney.
 />
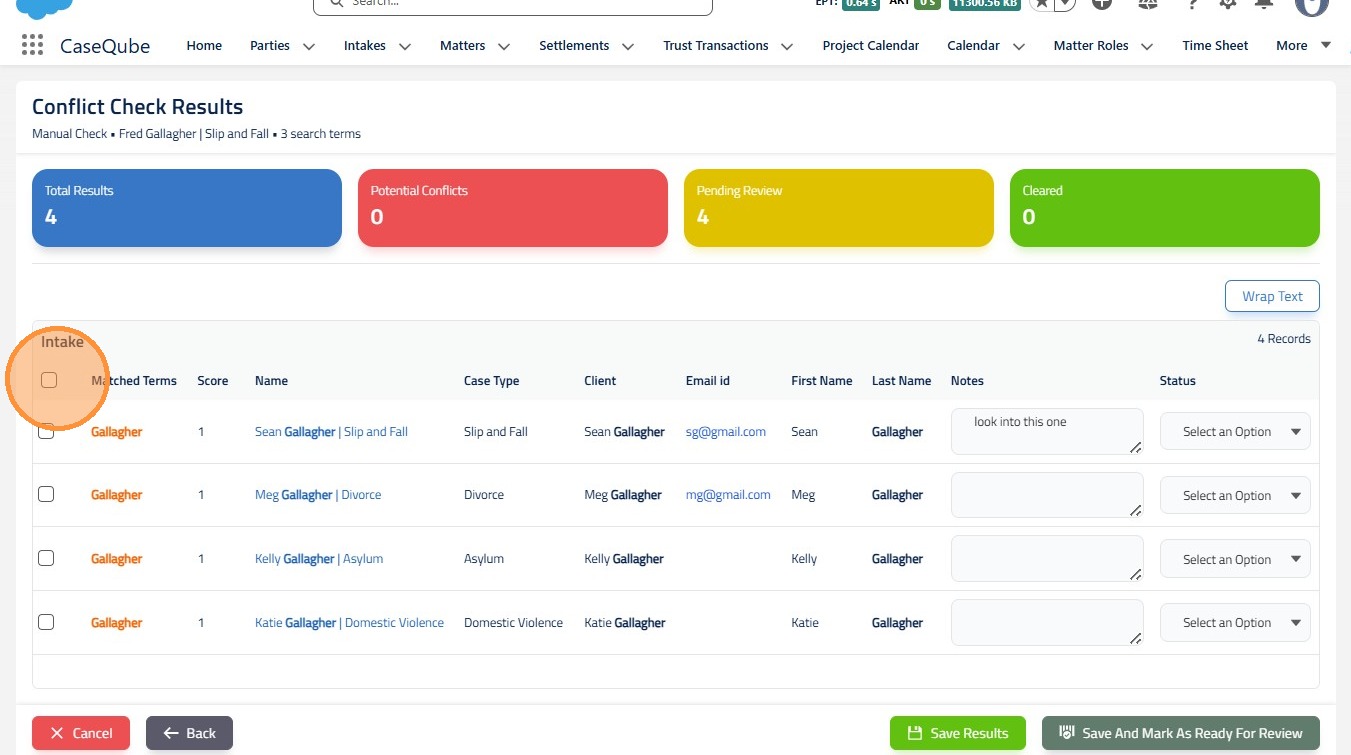
8. Update Term Status
Users may update the status for each term individually or update all terms at once by selecting the checkbox next to the matched terms.
 />
9. Click Select an Option and choose the option that best applies.
 />
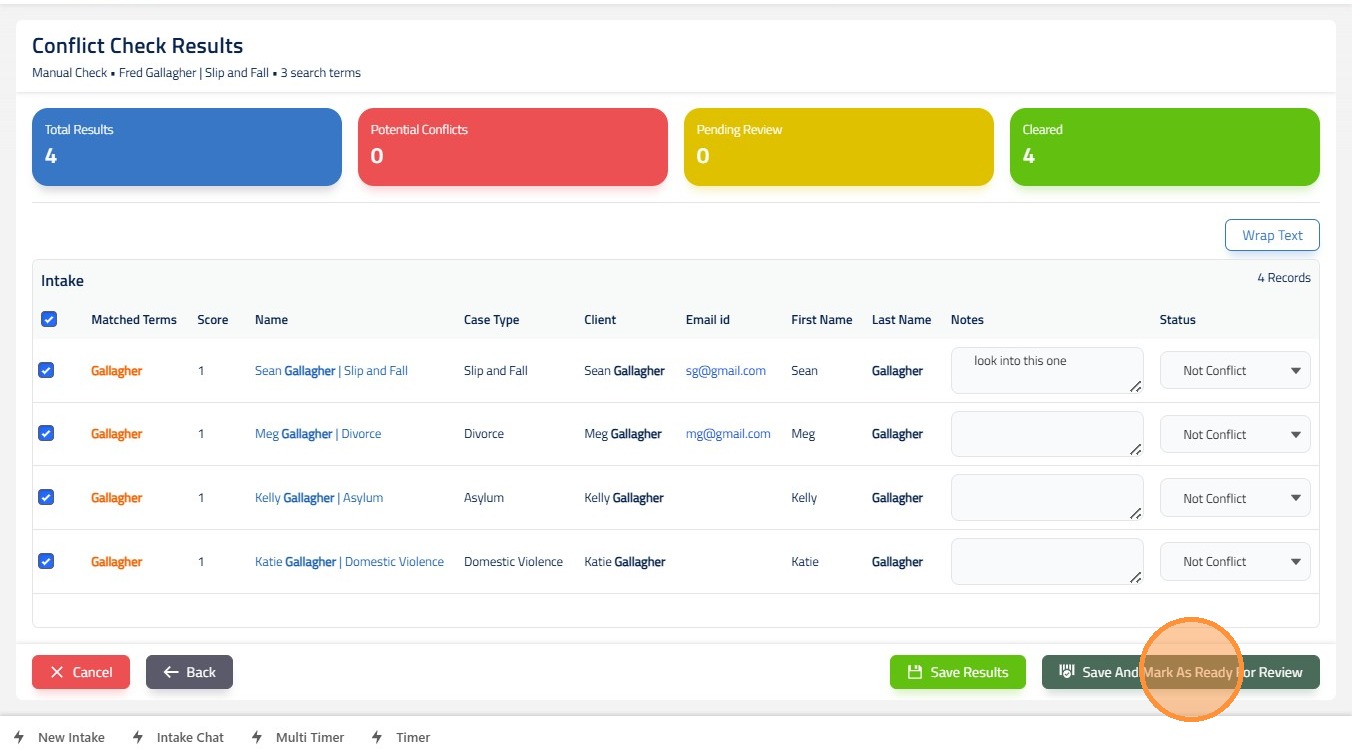
10. Save and Submit for Review
Once the appropriate status is selected, click Save and Mark as Ready for Review.
 />
11. Name the Conflict Check
Enter a clear, descriptive name for the conflict check, then click Save.
 />
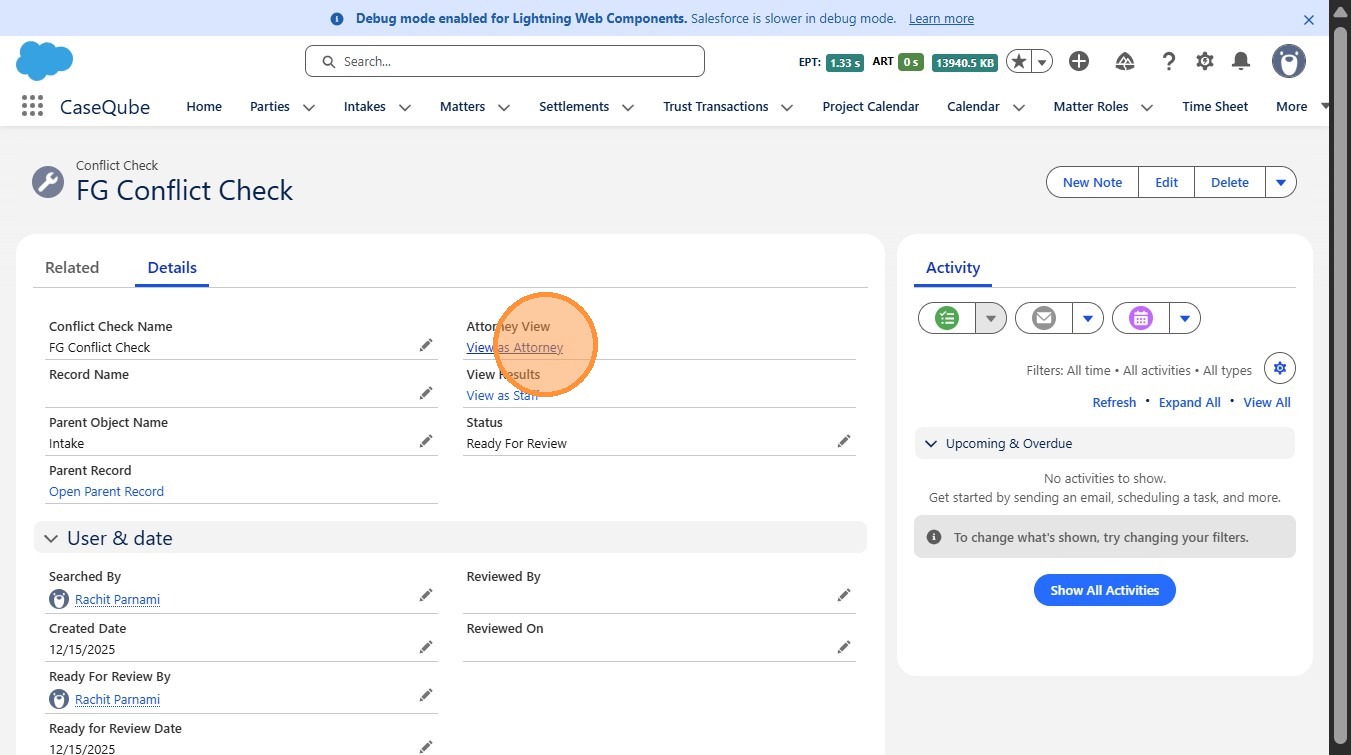
12. Switch to Attorney View
The attorney completes the final approval. Click View as Attorney to proceed.
 />
13. Review Notes and Terms
Review any notes provided, evaluate all listed terms, and select the appropriate status for each item.
 />
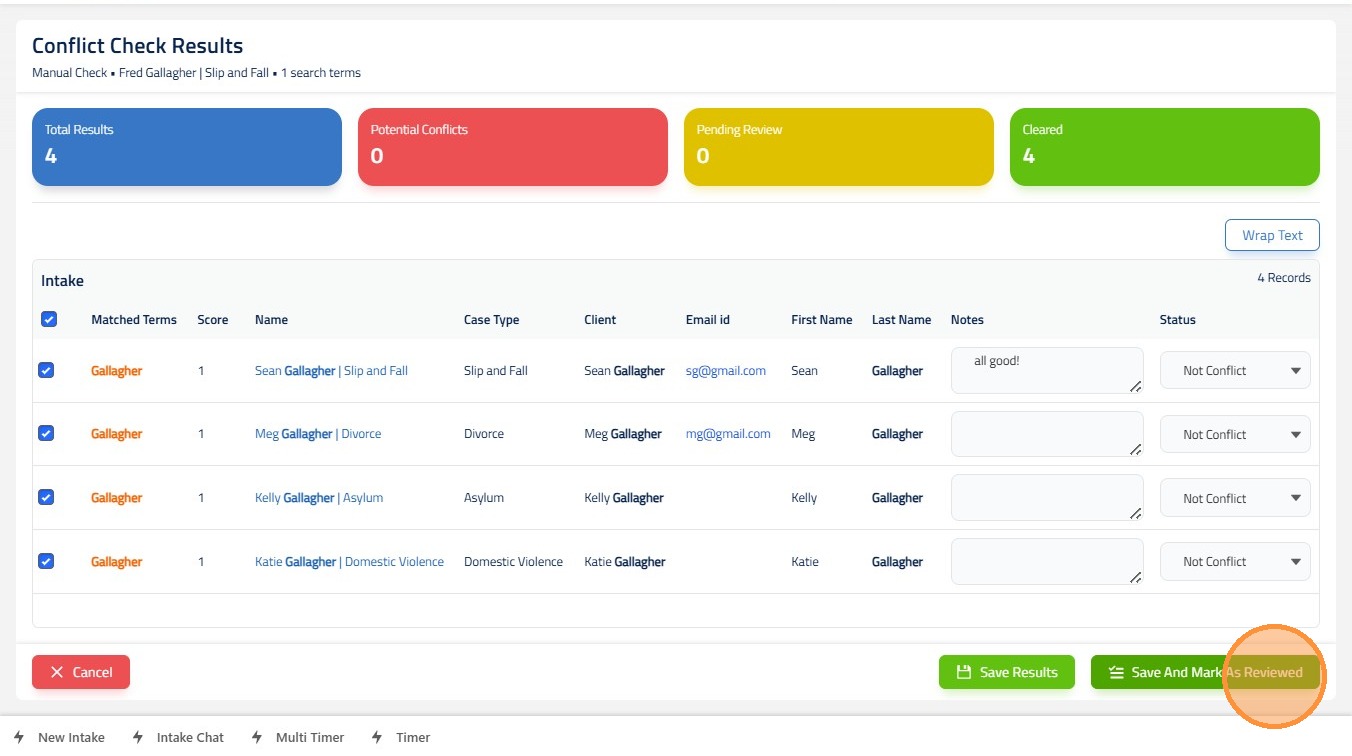
14. Complete the Review
Click Save and Mark as Reviewed to finalize the conflict review.
 />
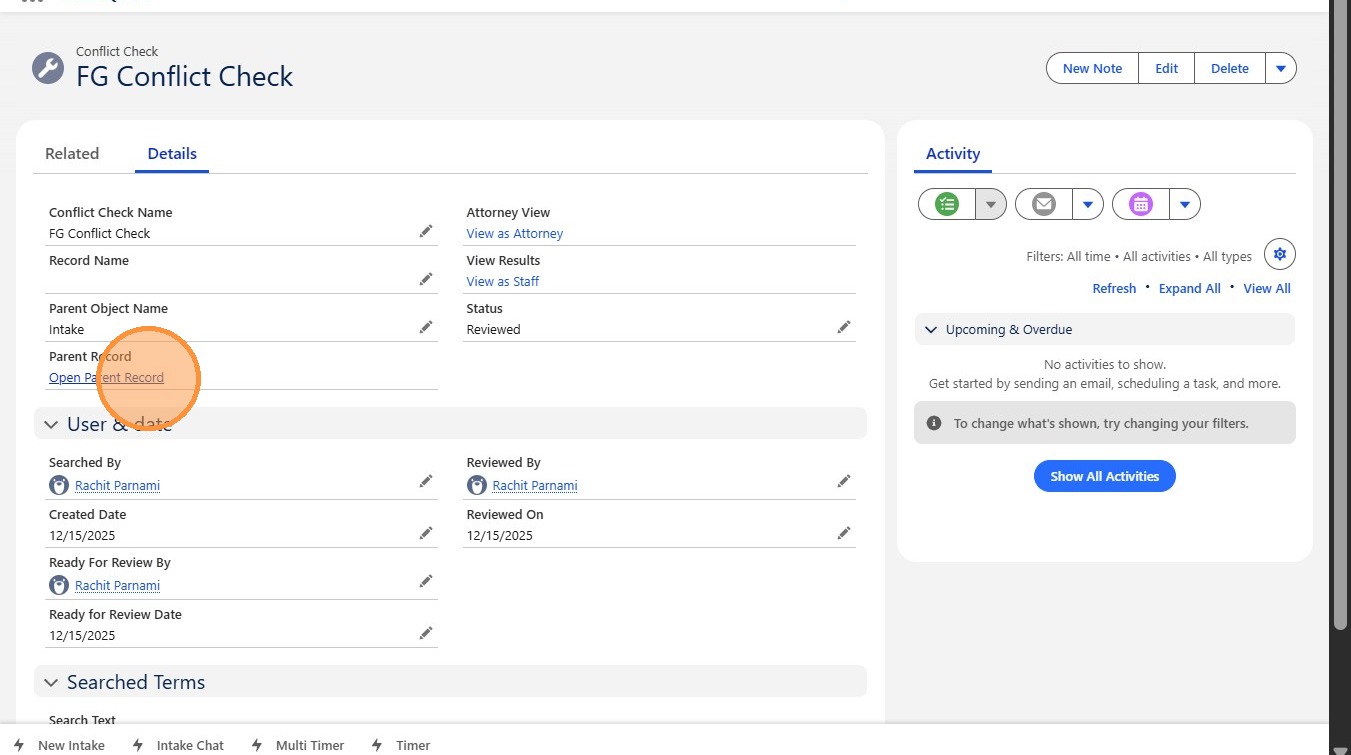
15. Return to the Intake Record
Navigate back to the intake record to confirm the conflict search outcome.
 />
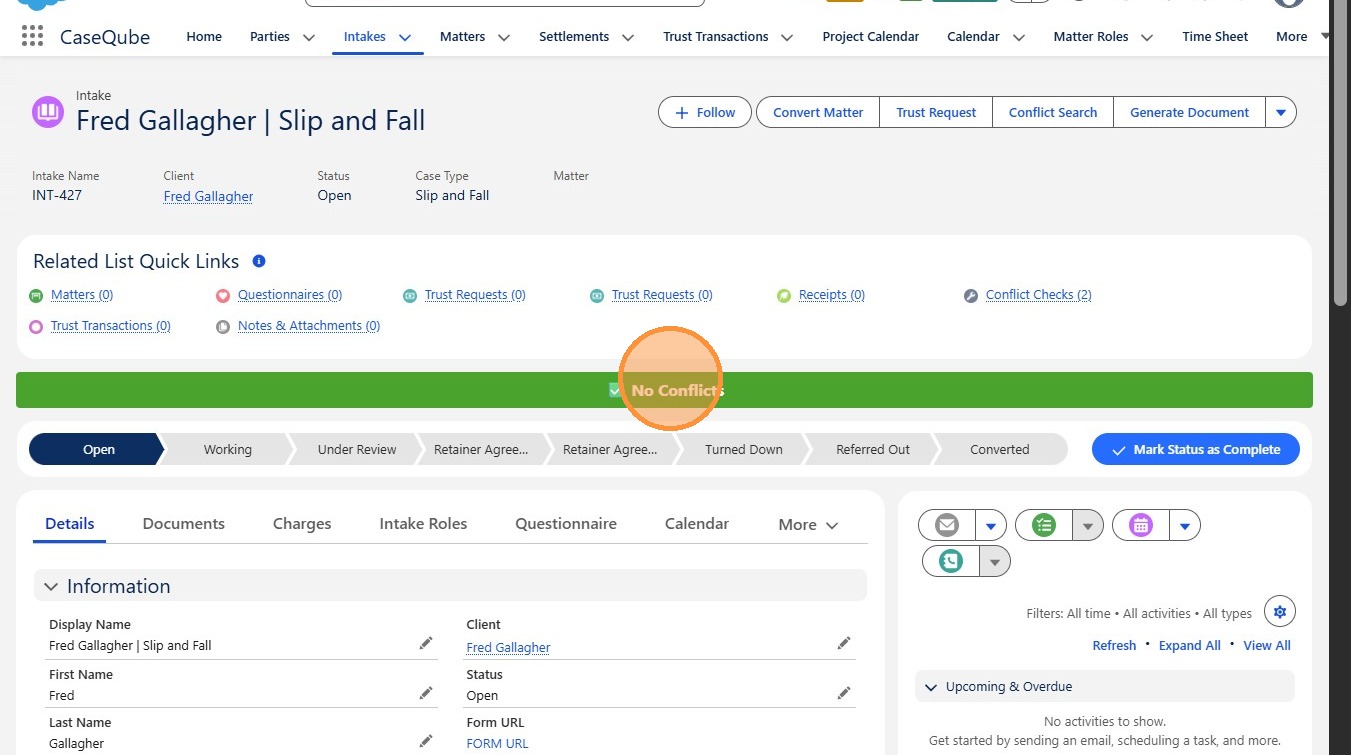
16. Confirm Conflict Resolution
The status bar will update to Green once the conflict check has been successfully resolved.
 />